Jtag Repair for bricked Cloud ibox 2 Plus & Cloud 3 Tutorial
Cloud ibox 2 PLUS and Cloud 3 J tag to repair wrong bootloader / bricked / Reflash Tutorial.
Okay with help from all over google land i have managed to repair a few cloud 2 plus boxes with this method and included files.
DO NOT BLAME ME IF YOU CANT FIX YOURS OR BREAK IT EVEN MORE.
Parts and tools Needed:
Windows XP, vista, or 7 machine (Believe linux as well)
micro usb to usb cable
Soldering Iron
Solder
4 x coloured electric wires (i used telephone extension cable as solid core) or jumper cable with male and female pins....(didnt have at time)
A flash interface - CYPRUS Development Board Module for USB2.0 EZ-USB FX2LP CY7C68013A ..... found on ebay
* drivers, and basic hand tools
Please note you need to make sure you flash the correct file for your SOP8 chip. This can be found on the rear of the motherboard.
its a load easier to solder anyway with the board out the box.
See picture below to help you locate it, you need to take note of the numbers on it....
It is the large black chip with 4 pins each side....
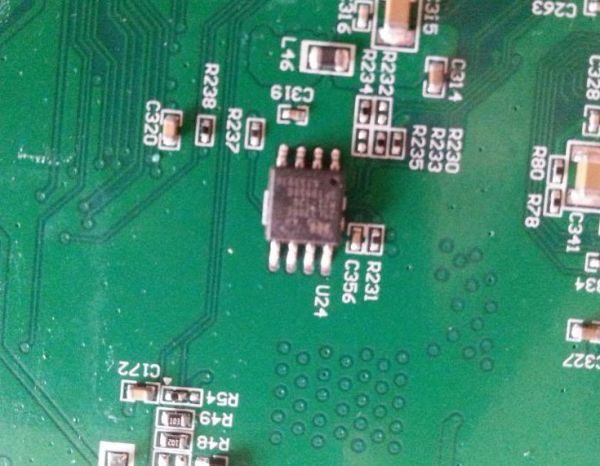
From what i have tested and read the following chip part numbers all take the same flash file. (see below for detail)
MX25L3206E
W25Q32BV
KH25L3206E
At this point download the attached filesand extract the zipfile to your desktp.
1. install Broadcom Studio 3
3: Install Bcm97358.msi (install to the same directory)
3: INSTALL NETFRAMEWORK 3.5 THEN NET FRSAMEWORK 4 (i had to for winXP machine)
4: Plug in the Cypress board to a free a USB port. BUT DO NOT connect the CLOUD IBOX to the cypress board yet.
****Disconnect the jumper on cypress board.****
Turn board on with its switch, red led is now lit up.
Then on your computer....
Chose install automatically, the driver installs and after you need to reboot computer.
After the reboot the above wizard appears again only it says:
"This wizard helps you install software for: Broadcom Test Adapter"
Follow the wizard using install automatically and after the wizard is done you are ready installing
Drivers for the Cypress board (Broadcom studio 3 will now know the cypress board).
TURN CYPRESS BOARD OFF
5. Now we need to make a cable between the cypress board and the CLOUD IBOX 3
Pin 1 is 3v3V
Pin 2 is SCL
Pin 3 is SDA
Pin 4 is GND
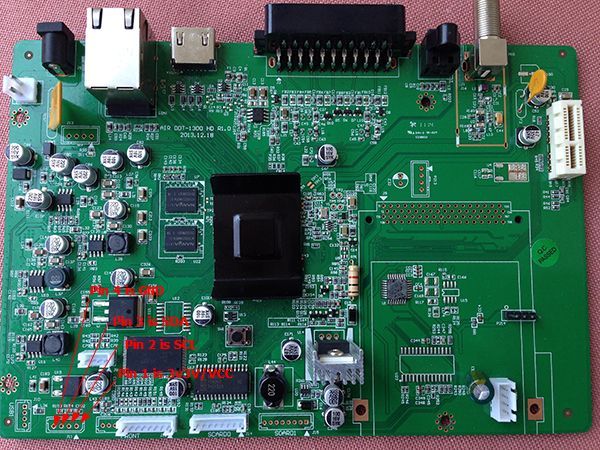
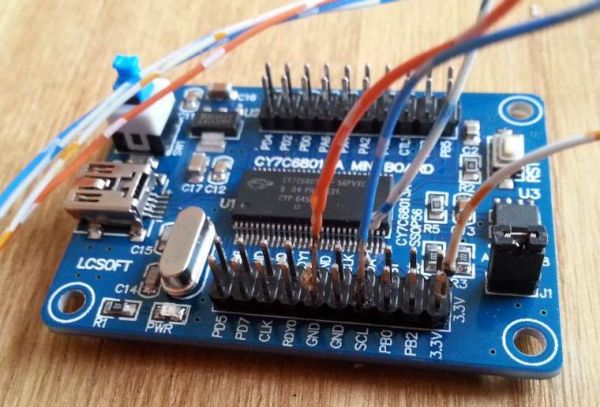
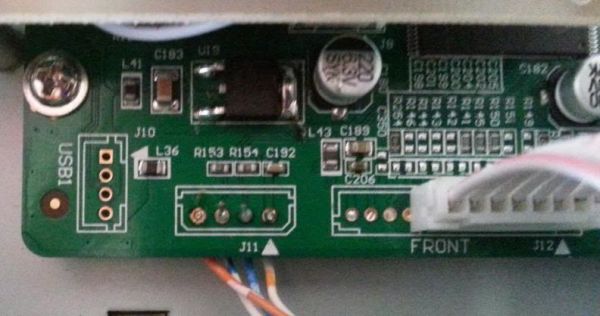
6: connect the cable between the cypress board and the CLOUD IBOX
7: Start Broadcom studio 3
8: In the menu select :
View => devices => BCM7358
9: turn on the CLOUD IBOX YOU SHOULD SEE CONNECTED
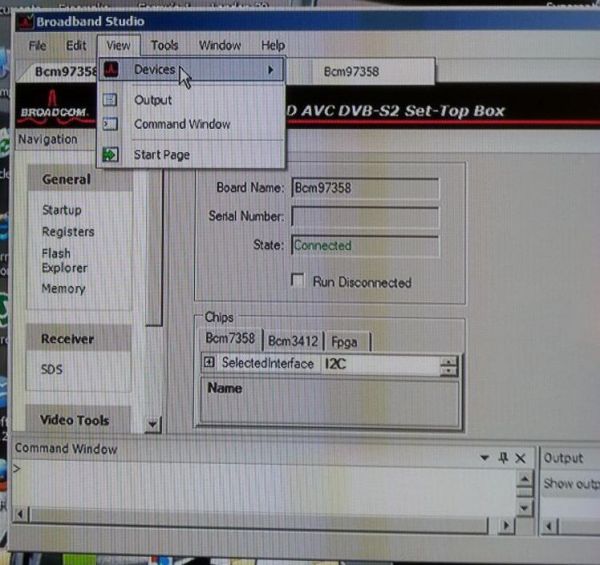
IF YOU DO NOT HAVE DEVICES AS AN OPTION UNDER BROADBAND STUDIO 3 YOU HAVE NOT INSTALLED THE SOFTWARE CORRECTLY....
10: COPY the 2 FLASH FILES SUPPLIED IN THE ATTACHMENT TO COMPUTER/ C:/ PROGRAMS/BROADCOM/BROADBAND STUDIO 3/FLASHES
Select "Flash Explorer"
11: Select "MXIC MX25L3206E" in the type field
12: Select "Refresh" IF CORRECT CHIP / FILES IT SHOULD SHOW DETAILS OF THE CHIP....
13: Select "Browse" and select the file CLOUDBOOT.BIN (included in attachment)
14: Select "Start" You should now see that the flash is being programmed to the CLOUD IBOX
THIS WILL TAKE ABOUT 30 MINUTES....
15: After the programming is finished turn off the cloud ibox, and turn off cypress, disconnect the cable FROM BOX to the Cypress board and turn on the cloud ibox
it should say boot, when it does turn it off....
Then flash an image as normal
put formatted usb stick to fat 32 with XPEEDLX FOLDER ON IT. THEN PUT IT in usb at back of icloud
turn on cloud ibox then let it install image when finished it will say done
Turn off box disconnect usb stick
reboot box & fingers crossed you will get a working cloud ibox 2 / 3
MEGA :
https://mega.nz/#!Yxo1hJBI!PJ6v6aFqjGl7aVMHkmXo4wgsRgBo88SH4TyinDWCo4c